Modern Masters Metal Effects solved this severe personality conflict of mine. I love things for my house that look like they've been around forever. I'm also super impatient as my husband can attest to. But realistically I don't have a hundred years to wait for something to develop a beautiful patina. And I also don't want to drop a small fortune for the real thing.
Dang. What's a girl to do?
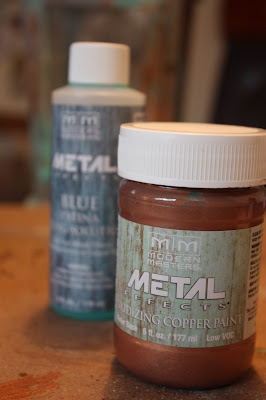
Luckily you and I can now achieve this gorgeous oxidized metal finish in an afternoon thanks to Modern Masters Metal Effects. I first discovered this miracle working paint at a workshop on how to use these products at , Me & Mrs. Jones.
Now that I work there I get to push my patina addiction on others.
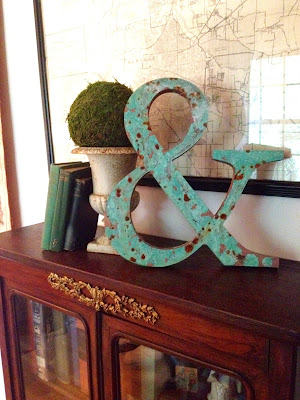
Let me start by showing you the finished product we created in the class. I was thrilled it was an ampersand since it's in the name of my blog and honey.
While I was sitting in the workshop I was picturing these two hammered metal lanterns on my back porch from Pottery Barn.
They must have been made for indoor use because they were getting really pitted with rust. In some instances I adore the look of rust but on these pieces it wasn't a good look. I snapped up the products I needed after the workshop and couldn't wait to get on these the next day.
Here's the overview but of course you'll want to read the directions and follow them. You start with a primer coat if you need that and then the base coat of the metal paint. I loved the copper and am going to have to show some restraint so my house doesn't end up looking like I inherited a copper mine. See how the rust wasn't the cool kind? I think it's because the original finish was super shiny and the contrast isn't a good one.
This basic technique is to apply the paint. which has actual metal in it, so the oxidation process is real and not just a faux finish, then apply the oxidizing solution. In the workshop we learned a few other tricks like dribbling peroxide and adding a powder like Gold Bond. I just used a generic baby powder for this and it worked fine. This process was very forgiving for someone like me who likes to experiment.
But I wasn't done. The glass on these beauties was clear and I didn't like being able to see the inside of the lantern was still the original finish. I wanted my illusion to be complete! Luckily I had some Krylon Frosted Glass spray paint on hand from some my Christmas windows.
It only took a minute to spray the glass and finish this project. I am in love with how they turned out!
In the tablescape above I also used Modern Masters Metallic Pain in Warm Silver to highlight the pumpkin details. It gives a soft sheen and a little glow to anything you use it on.
So of course you know what happened. I kept looking around for things that would benefit from this little upgrade. Here are a couple of those for bonus points. DING! DING!
The mail box...
A table top turned into a faux sundial...
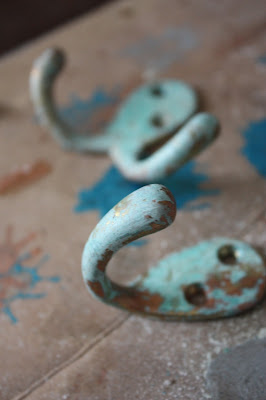
A couple of ugly brass coat hooks...
Okay, y'all! There you have it. Now go forth and oxidize!


No comments:
Post a Comment
Let's put the social back in social media and continue the conversation on Facebook! Check out the Pen and Hive Page.