Sunday, July 30, 2017
How To Create Your Own Reusable Food Wrap
I make and sell these so I know you are going to think I'm crazy for giving away this simple how-to.
But more than anything I want you to live your best and most creative life. My first priority is always to help you do that. So if you want to give this a try, here's how:
What you need:
Fabric
Beeswax
Propolis (optional)
Cookie sheet
Aluminum foil
Paintbrush
Pinking sheers
Caution: Use the lowest temperature setting on your oven when you do this project and don't use anything you don't mind ruining. Beeswax and propolis are super tenacious when it comes to clean up. It's best just to designate things for this project.
The Process:
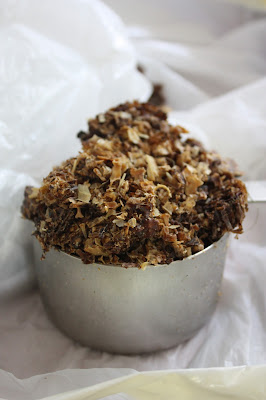
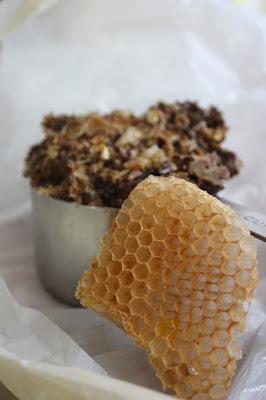
Start by grating your beeswax.
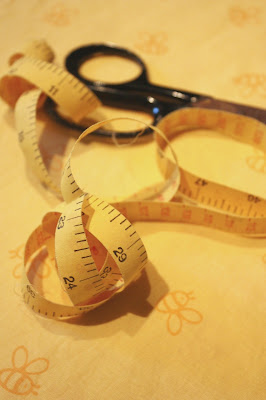
Cut your fabric to the desired size. My pinking sheers aren't too sharp after doing this a few times so I make my initial size cuts with regular scissors and then after the beeswax cools I trim the edges with my pinking sheers.
Line a cookie sheet with aluminum foil or use a disposable aluminum pan. That you are going to recycle, of course! That's why I love you.
Lay the fabric on the cookie sheet and then grate your beeswax/propolis over the top.
Place in an oven on a setting below 200* and wait for wax to melt. This should take about 10 minutes but this whole process involves a lot of trial and error.
Remove and immediately brush the melted wax over the fabric. Hurry! It will start to harden the second you take it out of the oven! However fast you think you need to go, speed it up.
I should probably tell you, that brush won't be able to be used for paint ever again. Like ever.
What's propolis, you ask?
Propolis is a sort of glue that the bees make out of tree resin. They use it inside the hive to glue everything together, to control the micro-climate inside, prevent diseases, and reduce vibration. When I was researching this process a lot of people said that the plain beeswax wasn't quite right and I noticed that lots of people said adding propolis improved the wrap.
Since I harvest a good bit of propolis along with my beeswax it was easy for me to incorporate it. I haven't ever bought it so don't have a brand of propolis to recommend to you. But here are some options.
Beeswax and propolis are both antimicrobial, antifungal, and antibacterial making them the perfect substances to put next to your food. Now you can reduce the use of those nasty chemical laden plastic wraps you've been using.
Rinse your beeswax wrap with cold water and gently wipe clean. You should be able to reuse it for several months before needing to replace it.
When it's used up its ability to seal toss it in the fireplace or firepit for a quick and easy firestarter or wrap a pinecone with it to really get things going. Yeah, I know. It's the same beeswax we were trying not to catch on fire before. Timing is everything.
And look at you! First recycling then having zero waste! You are winning at life.
Labels:
Home Recycled,
Living with less,
Recipes,
Simply Home
 Michelle is a beekeeper and master gardener. She writes and speaks about beekeeping, DIY projects, and how to live your best creative life.
Tuesday, July 25, 2017
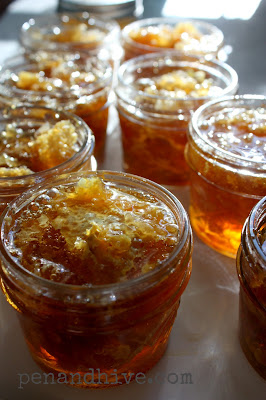
How to Enjoy Honeycomb
If the only honey you have ever had is from a bear-shaped jar at the grocery--you poor thing!-- then honey in its natural state (in the comb) might intimidate you a bit. You are going to be a big fan.
Trust me.
When people ask about how to use honey that has the comb in it, my first response is just to tell them to eat it out of the jar. Other than that one of my favorite things is a crisp tart apple and a piece of sharp cheese. The sharper the better. All that tangy and sharp cuts the sweet and makes it even more enjoyable.
But better yet, get yourself some hives so you can eat it right off the frame. That is actually my most favorite way. Is Honey Vegan? Read about it here.
So far this week we've had it on yogurt. And oatmeal. Okay, and spoons. Here's the recipe for my Tipsy Honeybee Cocktail.
While I think of filtered honey as a sweetener to add to something else, like tea or cocktails, I appreciate honeycomb as real food. A delicacy that is amazing paired with other things I like to eat. The wax isn't noticeable this way the way it would be if bits of it are floating on top of your afternoon chai. There really isn't any wrong way to enjoy honey except using if for cooking. All beekeepers and honey lovers frown upon that because heat destroys some of the magical natural properties of the honey and wax.
If I want to use a natural sweetener that will be cooked I use maple syrup instead of honey. I'm just not a Stevia fan. Raw honey contains enzymes that allow it to break down in your system over time instead of spiking your blood sugar and then crashing like processed sugar. Some of these are destroyed when the honey is heated.
Read this if you want to nerd out over the technical information about honey.
While honey is chemically sugar and should be treated as such if you are eliminating all sugar from your diet, it has some beneficial properties. It is these enzymes, probiotics, and antioxidants that I'm trying to preserve as a beekeeper by treating it gently. Raw honey contains not only enzymes from the bees but also the enzymes from nectar they collected.
That's right. Eating honey means you are eating like a god.
Everyone always wants to know if you can eat the wax. The answer is yes. It's easiest to consume along with food but you can also chew it until it loses it's flavor and then spit it out like gum. This was a common and fun thing for kids to enjoy before chewing gum became popular. I cannot tell you how the faces of older people light up when asked about honeycomb. I love hearing stories that start with "Oh, my uncle had some hives..."
Now if you are ready to look for some honey with comb in it you are going to want to find a local beekeeper to buy from. It's fun to try honeys from all over the world but if you want it for allergy relief, remember, you need it to contain pollen from your area to be effective. If you don't know any beeks then check out at your farmer's market. There is a whole sweet dimension to honey you have been missing.
Are you a fan of honeycomb? What's your favorite way to eat it?
Labels:
Beekeeping,
beekeeping 101,
Food,
Recipes
 Michelle is a beekeeper and master gardener. She writes and speaks about beekeeping, DIY projects, and how to live your best creative life.
Saturday, July 22, 2017
How to Create a Home Made Solar Melter with Stuff You Already Have
If you are a beekeeper you are going to have a lot of wax as a byproduct of your honey production. Maybe you are even more excited about the wax than the honey. There are just so many fun and useful things to do with this amazing resource but first you have to get it into a usable form. That means we have to melt and purify it.
Here are the things you'll need to replicate my process.
Cooler. Any kind and you aren't changing it so it will still be usable after this.
Aluminum foil.
Brick or chunk of concrete.
Shingle. Not actually necessary but they get really hot and speed up the process.
Bowl or other container. Plan on designating one bowl for this as beeswax is almost permanent.
Water.
Cheesecloth or fabric. (I'm showing you both in this post)
Old window or other large piece of glass. A storm window is ideal.
A hot sunny day.
Line the cooler with aluminum foil. Place the brick in the bottom and arrange the shingle where you think it will absorb the most heat.
Put a little water in the bowl to allow the beeswax to be removed later in a single piece. Cover the bowl with cheesecloth or fabric and secure it around the edges. You can tie it, use a rubber band, but I have found these office clips to be the perfect thing for this. Pile your honeycomb on top. Lay the glass over the cooler and let the sun do its job.
It's very interesting to see what you come out with. Sometimes there are impurities and you need a second melting. I haven't had to do that though. The system is providing me with beautiful clean beeswax. There are some beautiful color variations. You can see how much melting has taken place after one hour.
This is a great thing to do with kids to teach a fun science lesson about solar power and heat.
Caution! Do not be fooled into thinking that this wax and water will not be hot. They will be HOT. You do not want to spill melted beeswax on your skin. The bowl has been so hot the last few times I did this that I had to use pot holders. BE CAREFUL.
When it cools, remove the fabric with all the old comb and impurities in it.
Check out your beautiful clean beeswax floating on top of the water.
Once you gather all your needed supplies you can set this up in like one minute. I literally am doing it every single day right now because I had so much beeswax stored in my fridge all spring and summer.
I needed to process it to make room and this does a pretty small batch at a time.
This is perfect if you have a backyard beehive or two. I have seven and this process can still handle all of it but it helps that I have a whole refrigerator that I can fill with all my frames and wax to protect it from wax moths while I'm waiting to do this.
What is your preferred way to process your beeswax?
Next time I'm going to share how to make the reusable food wraps that I made using this wax!
 Michelle is a beekeeper and master gardener. She writes and speaks about beekeeping, DIY projects, and how to live your best creative life.
Tuesday, July 18, 2017
Summer Honey Sale Recap
Over the weekend I had my annual summer honey sale. My husband is really glad that one of my hobbies finally pays for itself. Plus it brings people to our house. You know how the extroverts love that. Speaking of extroverts here he is with my daughter. What a pair of social butterflies.
Besides hanging out with the bees, a very introvert thing to be doing, it's the jarring, labeling, and stacking the honey that makes me smile the most. To see it all displayed like this after all those smoky sweaty days in the bee yard makes me super happy.
Do you see the huge variation in color? Y'all, I have never had that happen before within the season. Usually we have light sweet spring/summer honey and dark intense late summer/fall honey. Like this. And let me tell you, people have a preference!
This year on one frame I had light on one side of the frame and dark on the other. One thing about bees is they always surprise you. We had a spring that was about 3 weeks ahead of schedule so maybe that's why.
The color variation is just astounding to me!
The other thing you get from keeping bees of course is wax. It's an amazing product in itself. Did you know that bee have to eat 6-8 pounds of honey to create one pound of beeswax? Beekeepers treat the honeycomb like gold. It represents a lot of work for our girls. Have I told you I think bees are amazing?
Oh, okay, just checking.
I use the wax to make other products like lip balm and hand cream. It's fun to make your own skin care products and comforting to know exactly what's in them. I benefit a lot from all the testing I do on myself!
This year I offered something new I've been working on: reusable beeswax food wrap. I use this myself in place of those annoying plastic wraps. Beeswax is naturally antibacterial and antifungal so it's the perfect food wrap or dish covering. As long as it doesn't get overheated it should last many months before needing to be replaced.
And a salt scrub I make called Kitchen Sink because it has so many ingredients. Plus I use it in the kitchen on my hands at the end of the day as I kind of after dinner/end of the day ritual. Last year's scent was rosemary and sage. This year I went with tangerine and lavender. I dehydrate and grind real tangerine rind to go in it along with lavender blossoms and a host of other decadent things from nature.
Each jar is topped off with flower petals and a jasmine blossom so opening it the first time is an event!
A friend agreed to come and take pictures for me because I thought "Wouldn't it be fun to have some candid shots of the whole thing?" Apparently people aren't too keen on being ambush photographed on a Saturday at a friend's house. I don't know what's wrong with people.
She took this one which I am using on the blog and Facebook page!
*
In an effort to appease the masses I have carefully chosen the photos here.
*
I totally roped this friend into having her pic made. If you are an introvert like me you need those extroverty friends to call up and inform you that yes, you are, going to IKEA on opening day, or test driving a car, or going to a movie. You know that by "extroverty" I mean bossy, right?
*
You wouldn't even know I'd been working so hard on my lettering this year because I didn't think this through at all and made this sign five minutes before people started to arrive.
*
Check out this adorable welcome mat that my friend, The Food Maven sent me a few months ago! It makes me happy every day! Y'all!
*
So now that that's all over I can get back to work and start planning the fall honey sale. Remember...
* Photos by Janelle Melliton
Labels:
Beekeeping,
hand crafted skin care,
Home Recycled,
Skin Care
 Michelle is a beekeeper and master gardener. She writes and speaks about beekeeping, DIY projects, and how to live your best creative life.
Tuesday, July 11, 2017
How to Style Your Caftan: Playing Dress Up at Home
Okay, if you've been reading along chances are you have either ordered yourself a caftan online or made one for yourself. Here's the post on how to do that!
Now what?
I am so glad you asked! One of the joys of wearing a caftan as opposed to that all American female loungewear (AKA things that should be cut up for rags) is that you can have fun with it. Let's face it, there is something about putting on sweatpants and a t-shirt that makes you want to eat a pint of rocky road and watch 17 hours of the Kardashians. It makes me feel like my spirit animal is a sponge... taking a nap.
Putting on a caftan makes me feel like the appropriate behavior is reading a book and having a cup of tea. Maybe I'll practice the Rhumba while the souffle is baking! Okay, that's exaggerating, but seriously, putting on ratty clothing for anything but yard work makes me feel like nothing else productive can happen today. A pretty bad thing if it's just after lunch.
Wearing a caftan is a great excuse to wear your favorite pieces of jewelry around the house. Do you have some GINORMOUS pin that you never wear because it's just too much? Pin it on your caftan! Those dangly earrings you bought on vacay that are just over the top with your work wardrobe? Get them out and put them on.
No, really. Like right now.
Add something under your sheerest caftan.
A lot of gorgeous caftans are super sheer and made for beach wear. Do you think that's going to stop us from letting them see the light of day between trips to the pool? Nope. Add a clean white tank and white leggings underneath with sandals to make it work for going to the grocery. Girl. You'll like a movie star in aisle 6.
Take a pen for signing autographs.
Sandals. There's no photo for this because who wants more than one picture of feet? (Well, except that one guy.)
I have one pair of flip-flops and I only wear them at home. The amount of dog hair in my house discourages strongly my going barefoot. But I don't wear these beach shoes anywhere else. Okay, maybe the mailbox. If I'm headed anywhere else I trade the flip-flops for sandals that qualify as real shoes. It's a small thing but it says to the world "I'm trying, okay?"
You'll be so glad you chose real shoes if you run into your husband's college girlfriend at the farmer's market.
Sunglasses. Sunglasses. Sunglasses.
I have a lot of fashion fantasies. One is shopping for caftans in Morocco and another is wearing a caftan in San Tropez. My fashion imagination has me wearing sunglasses in both scenarios obviously. If you are hanging inside during the heat of the day use them for an impromptu headband. You may be making a sandwich but you'll look like you just arrived from the Riviera.
Isn't this fun?
Lipstick.
Yes. At home. On a Saturday. You can do it. Now if you are like me your husband will ask "Where are you going?" Do not be deterred. Just continue to enjoy playing dress up. Personally, I think confusing men is good for them. Not to mention, entertaining for us. There is something incredibly fun about dressing the way you always thought you would when you were little. No self-respecting little girl imagined growing up to wear gym shorts and her husband's 20-year-old fraternity shirt.
Embellish your caftan!
If you don't like the idea of adding jewelry around the house you can always embellish your caftan by adding beadwork, appliques, or faux jewels. Here's the neckline of the one I made for my daughter. In this post it was plain. I wanted to make sure she liked it before I did all that extra work!
You might even actually twirl. In your kitchen!
So this completes my 3 part caftan series. Now I have to put on the less attractive and super hot bee suit and get back to work. If you made it this far welcome to the Caftan Tribe! Post pics! Send postcards! Leave comments! Name a kid after me! Because clearly we are besties now.
Labels:
The Wardrobe Chronicles
 Michelle is a beekeeper and master gardener. She writes and speaks about beekeeping, DIY projects, and how to live your best creative life.
Thursday, July 6, 2017
How to Make a Simple Caftan Complete with Dramatic Photo Finish
I am not a seamstress, like by a long shot. I'm short on patience and there's a good bit involved in sewing for real. But even I can make a caftan so if you want to give it a whirl and have limited sewing skills, I'm your girl. Seriously, no pressure.
What you'll need:
Around 3-3 1/2 yards of fabric depending on your height and how long you want it to be.
A word about fabric: If you aren't an experienced sewer, start with a heavier weight fabric like the ones here. At the very least the weight of a cotton broadcloth. Some of the flowy fabrics or material that stretches can be tough going for a new seamstress because they shift around so much.
Trim like rick-rack, fringe, tassels, pom poms, or braiding. For the neck and arms you'll need about 2.5 yards. If you want to go down the front, across the bottom hem, or sides add in the extra measurements.
Thread to match your material or trim.
Scissors, measuring tape, sewing machine.
Here's a very basic how-to.
The pattern.
Here's the recipe for a caftan: A giant piece of fabric folded in half with a hole cut out for your head and seams along both sides leaving openings for your arms. Okay, they are basically shapeless. That's why the colors, patterns, and trims are the most important and fun part of this project. And this little DIY gets bonus points for your only having to know how to sew a straight line!
That's it! Now you can make all sorts of changes. You can make it a v-neck or square. For this one, I created a v-neck. You can make it super loose or tighter, you can make it short and sassy or long and dramatic. Guess which one I like.
Here's how to find where to cut the neck hole:
Fold the fabric like in the video and then make your cut on that corner where all the folds come together.
The first ones I made I just cut a hole and stitched the edges down. That's fine but you can also add an inner facing.
Well, not exactly like this because yours will turn out better. If you have legit sewing skills, feel free to make fun.
Next, I stitched the right sides together around the neck hole.
Press the seam open. Now turn your neckline right sides out.
And press. Honesty, ironing is the secret to sewing.
On this one I added some cording as a trim around the neck and stitching it in place helped hold the facing flat.
Here's another photo of this.
I thought this would look chic being so plain but it just looked like this caftan washed up on a boat dock somewhere. I had this darling turquoise and gold chevron grosgrain so I stitched it on using the machine. That facing isn't going anywhere now.
Hem the edges (sides). This takes the longest of anything. Do both sides. It will take forever. Watch your favorite series from season one episode one or something.
Now measure from your shoulder to wherever you want the length to be. Add a couple of inches for a hem. Now stop and measure again before cutting! Then cut if it is too long.
A word about length: In this kind of fabric our caftan should either be so long that it brushes your ankles or short and sassy. There is a length that will make it look downright Biblical and that is someplace around the bottom of your calf. If you end up looking like one of the three wise men in the church Christmas pageant, don't say I didn't warn you. Once you move on to lighter fabrics they can be any length and will look great.
Fold under once and then once more to create your hem. Stitch in place.
When you get to the corners where you meet the side hems, create a little fold like you are wrapping a present. Stitch.
That's about it! You can add trim to the arms and to the bottom hem or all the way down both sides. It's your caftan! Do whatever you want!
The last step in the process is using the timer on your phone to snap some dramatic photos of you in your caftan.
One problem with a retired husband is that sometimes he wants to know what I'm doing. "What are you doing?" is a classic husband question. Right up there with "Where are you going to put that?"
Usually I run around like a squirrel and hope he doesn't notice me. Because sometimes it's hard to explain. But you get it, right?
How do we not have a pool? This caftan would look amazing by a pool! Or, you know, on a yacht.
Now the other great thing about this is that if you decide caftans aren't for you (are you on crack?) you can cut it off short for a beach cover up. You could cut it down the front and add a sash for a summery robe. Heck there is so much fabric that you could remake the whole thing into pillows for your patio furniture. About four of them.
In the next post I'll be covering How to Style Your Caftan.
Labels:
The Wardrobe Chronicles
 Michelle is a beekeeper and master gardener. She writes and speaks about beekeeping, DIY projects, and how to live your best creative life.
Subscribe to:
Posts (Atom)


